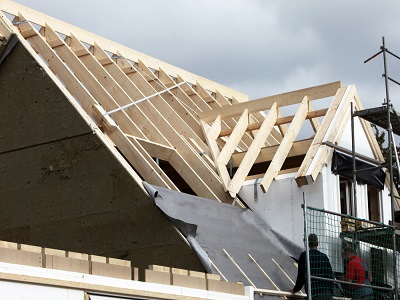
You might have noticed broken shingles on your roof or ceiling leaks. Even the most durable roofs can be damaged by the elements, so you may need to have a roof replacement sooner or later. Although a new roof installation is not something that is recommended for the average DIYer, it can be useful to learn how to replace a roof before you hire a local roofing contractor. From start to finish, here’s what you can expect:
What is the purpose of a roof replacement?
Roofs can last between 20 and 50 years depending on their material and how well they are maintained. However, roofs will experience significant wear over their lifetime. High winds, flying twigs, and leaf and snow accumulation can all cause damage to roofs. Roofs are important for your safety and that of your family. However, they must be in good condition. Roofs can leak and, in extreme cases of collapse, could cause serious damage.
How to replace a roof in 9 steps
1. Removing old roofing materials
Although you can replace the old shingles with new ones, it creates a less stable and secure roof surface. Roofing contractors will instead use a roofing shovel and carefully remove any existing roof material. Then, they will dispose of it in a dumpster. This step is the most difficult part of the job. If you don’t have the necessary skills, hire a professional.
2. Repair the roof if necessary
Roofers may have to replace the sheathing or repair the frame of an old roof. This will give the roof material a strong, long-lasting foundation. It is not acceptable to just cover up a roof that has been damaged with new roofing material. This will not fix the problem, and may even make it worse.
3. Add the Drip Edge
Although you may not require a metal drip edge for your roof, this material will prevent water from leaking onto the fascia boards.
- Place the drip edge against the fascia boards.
- Secure the drip edge by using roofing nails to pass through the decking.
- Roof nails should be placed every 2 to 3 feet.
4. Install water and ice barriers
In some areas, a water and ice barrier or shield is necessary, especially if there are harsh winters. This step is essential if you want to avoid costly water damage later on. These barriers, also known as ice or water underlayment, are designed to prevent water and ice damage to the roof sheathing. They can be used on roofs with pitches of 2/12, 3/12, 4/12, or 5/12 and any valleys. To protect against water damage and ice damming, the contractor will place the water and ice shield at the roof’s edges.
5. Install the roofing paper
After the underlayment has been installed, the contractor will start laying roofing paper. The contractor will overlap towards the roof peak to protect against fire and moisture. At least once every 12 inches, the roofing paper must be stapled or nailed to the roof sheathing.
6. Use proper flashing to protect from leaks
It’s all about protecting your roof from leaks. It is important to keep water from getting into your roof sheathing and interior by using flashing, roofing paper, and ice shield. The damage could prove costly if it is not prevented. For the best protection, the roofing contractor in Greenville will attach metal flashing to the valleys of your roof.
7. Bring the shingles and other roofing materials
Once you have the right protection in place for the elements, your roof will begin to materialize once the roofing material has been installed. The contractor will begin to apply shingles or roof tiles near the roof’s edges, at the metal drip edge and near the eaves. Next, he will work toward the roof’s peak.
8. Finish with the ridge vent
If your roof does not have one, you will need to install one. This roof component can help prevent ice damming and improve air circulation. When you are ready to add roofing to an existing or new ridge vent, the contractor will first install flashing around it.
9. Get a roof inspection done
Roofs are vital to our safety. You will need to clean up the area and have a builder inspect the job. Your new roof can be installed once you have given your approval.
Call KM Roof and Home Repair now if you need professional and reliable roofing services in Greenville.
Like our Facebook page for more great info about roofing services.
KM Roof and Home Repair
310 Iveydale Dr.
Greenville, SC 29609
864-535-9184
www.kmroofers.com

No comments:
Post a Comment